I had posted this article on Heroscapers a while back.
So there is no real guide on printing and having to figure it out myself(sizes, paper types etc) was a real pain. I was able to post on the forum at the heroscapers site and get a few tips but nothing really worked for me, SO I set out to figure it out for myself.
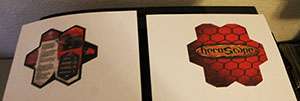
First and foremost most of you do not do a backside to your cards. If anything it is a rare occasion that I find one with a back. The back image on the heroscapers is terrible and all of them on google are horrible! So the first step was to make a back for my cards. With a bit of googling(to get a good version of the logo, cleaning up and just doing it myself I came up with this in photoshop.

The next step was to figure out how large it needed to be to completely cover the card even if there is a bit of misalignment on print. So I broke out a ruler and learned the following approximate measurements.

So what does that mean? The end result, aka the actual card needs to be around 12.5 cm wide. Well cool, that gave me my measurement!
Using that I cropped and resized my target images to fit width: 12.5cm! I then took a page from Xorlof‘s tool and gave them a border so I have some fudge area. with this and the large background, I was able to have something I could print front and back.
So now I have my working front and back prototype. A quick swing by office depot and I picked up one of those small cutting boards, some 3mil laminate and some cardstock. Sadly they had no glossy card stock and I was forced to settle for some mat finish stock. You want glossy, it has more vibrant colors.
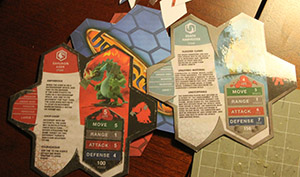
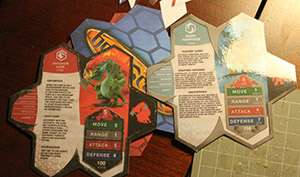
So I put my images in a word document, because that was the easiest way to do the whole left and right alignment I would need for my print out. Since I always at least have 2 of a figure, this works out.
so you are seeing page 1 and 2. As soon as I printed the images, I didn’t shuffle or anything. I just put them back in the printer top side up and printed the images again. Doing this resulted in 2 copies of my card printed front and back on my card stock.
next step I used my cutting board to trim them down and place them in my laminate sheet.

I left extra paper because I don’t want air along the edge. I am ok with these not being completely sealed up(I can always print more). if you want them water proof you will need to cut them free of their paper prison first before you laminate.
Next step I used my cutting board to get whatever I could cut away. Leaving only the little triangles of white paper.

THIS NEXT STEP YOU TAKE AT YOUR OWN RISK! If you are not an ADULT capable of intelligent use of a razorblade or value your fingers, use a pair of scissors! I have bled for 20 plus years using these xacto knives. unless you are good with a knife, use a pair of scissors PLEASE!
Whipping out my decade old self healing xacto mat and my xacto knife I place each card on this self healing mat and draw the knife blade along this red line towards me. My hand is on the FAR END OF THE CARD where the yellow/green arrow is pointing to the right because safety. Cut slowly so you do NOT hurt yourself and keep your fingers far away from the blade. ROTATE the card for each cut. Always straight lines along that red line. ALWAYS keep your fingers clear!
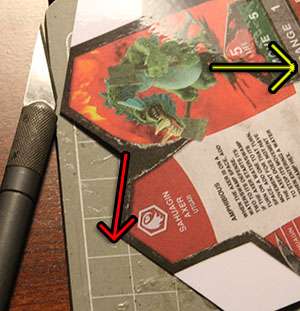
IF YOU USE A KNIFE TO CUT YOUR CARDS THAT IS YOUR PERSONAL SAFETY RESPONSIBILITY!
It didn’t take that long. Once I figured out how to handle the image bleed(when the back didn’t cover enough for the front) and had them printing at the right size, EASY AS PIE.
you can get my card back images here:
http://www.heroscapers.com/community…o=file&id=4282